

Sharing files using Teams
Using a cloud service to securely share files is easy if you have a Microsoft 365 subscription. This short article explains how to get started.
Your Microsoft Subscription
All Microsoft 365 subscriptions come with storage that allows you to use Teams and SharePoint to store data and share it. If your organisation already has a Microsoft 365 subscription you are ready to go, there is nothing more that needs to be setup.
Teams
Open up the Teams application if you have it installed. If you need to download Teams you can get it here: Download Teams or see our article How to Install Microsoft Teams. When you first install Teams, you will have to sign in. Use the email address and password for your Microsoft 365 subscription to log in.
Create a Team
A team is a group of people gathered to get something done in your organisation. It can also be your whole organisation.
First click Teams  on the left side of the app, then click Join or create a team at the bottom of your teams list. On the Create a team tile, click Create team.
From there, you can name your team, add a description, and edit the data classification for the team. Once you’ve done that, you can invite people, groups, or even entire contact groups (formerly known as “distribution lists”) to join your team.
Add People to a Team
If you’re a team owner, go to the team name in the teams list and click More options  Add members
  .
.
If you want, you can even add multiple people by typing the name of a contact group, security group, or Office 365 group. All of the people in your organisation that have a Microsoft 365 account will be listed and available to add to your team.
A team can hold up to 2,500 people.
Note that the team members you have just added will have access to the data you store for this Team. If you do not want certain people to access data, then do not include them in this Team.
Create A Channel
Once you have created a Team and added the relevant members, you need to add a Channel. Channels are where the work actually gets done—where files are shared, and where apps can be installed or chats within the team can take place.

To create a new channel, start in the team list. Find the team name and click More options > Add channel. You can also click Manage team, and add a channel in the Channels tab.
You can create up to 200 channels over the life of a team. That number includes channels you create and later delete.

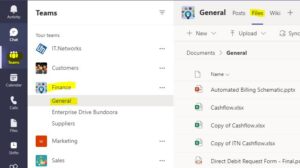
File Storage
Files that you share in a channel are stored in your team’s SharePoint folder. All Team members will have access to the files that are stored in the team’s SharePoint folder. To copy files onto the channel, select the FILES menu at the top.

Simply drag the file you wish to store into the Teams window. This will copy the file into Teams where other team members will be able to access it. Ensure you delete the original file so you do not end up with multiple copies of the same file.
Sharing Data
Now that you have data copied into the channel, anyone that you added to your team will have access to it. The people that you added to the team will be notified that you added them (through a pop up in Teams) and the Team will automatically be added to their list of available teams in the Teams application.
All the user has to do is select the Team, Channel and then the files menu to access the data copied. You are now sharing data on the cloud.
Useful Articles
We have produced several other articles on Microsoft Teams now that you are sharing data. Please see the articles below:
- How to recover deleted files and restore previous versions in Microsoft Teams
- SharePoint Data on your local PC
- How to open Microsoft Teams and SharePoint files in Windows Explorer
- Stop Using OneDrive!
- Stop the Microsoft Teams Clutter!
- Microsoft Teams: Video Conferencing
- Microsoft 365 Information Protection