


Renew Your SSL Certificate
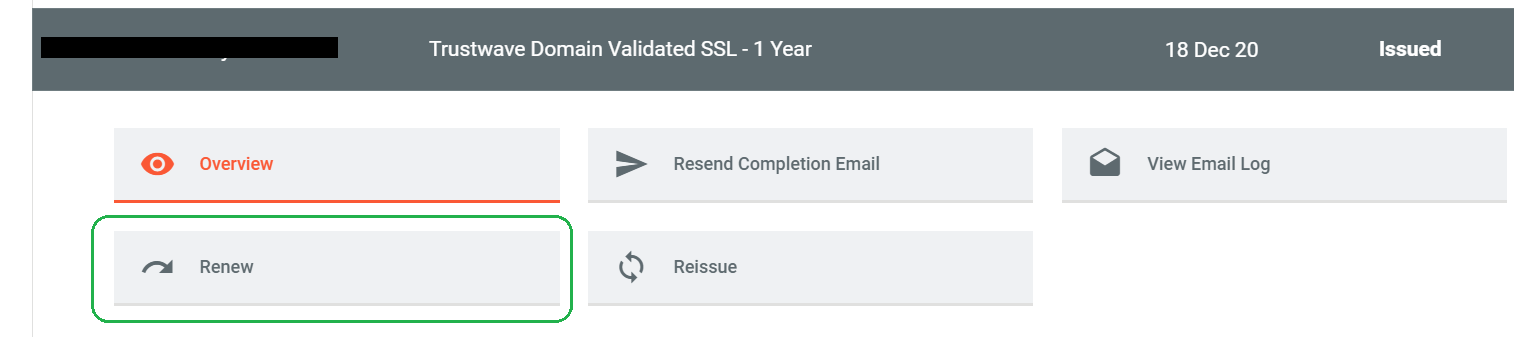
- Head over to your certificate provider, in our case Synergy Wholesale, and go to the expiring SSL Certificate and click Renew
- An email for domain validation will now be sent to the following email addresses:
- administrator@domain.com.au
- webmaster@domain.com.au
- hostmaster@domain.com.au
- Once the email is received at the above addresses, obviously accept the domain validation
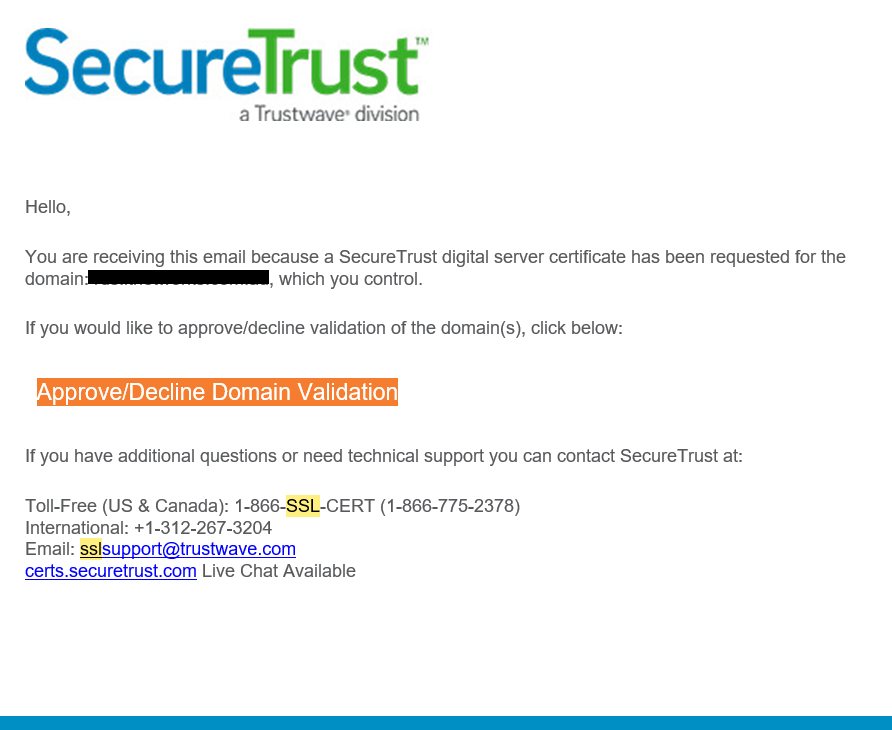
- Approval will take a few hours and sometimes days! Please wait for the approval with the attached new Certificate.
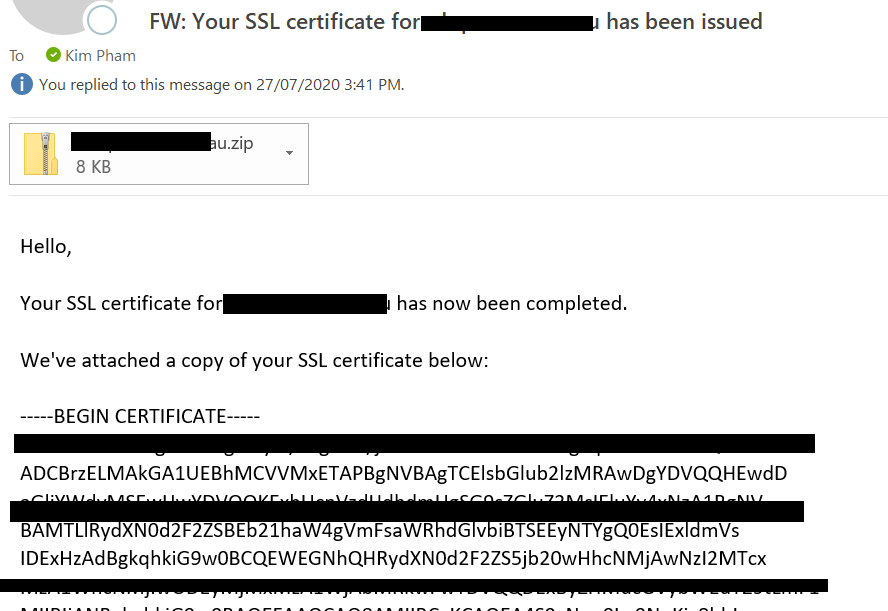
- In the email, highlight and copy the certificate text, including the ‘Begin Certificate’ & ‘End Certificate’ in to a new Notepad file
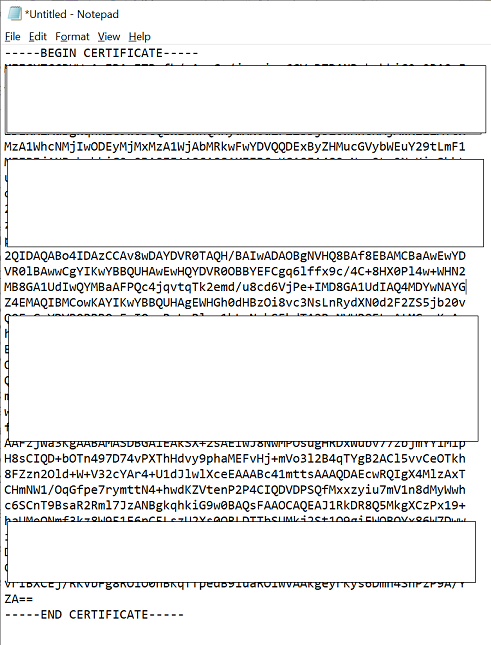
- Save the File as certificate.cer
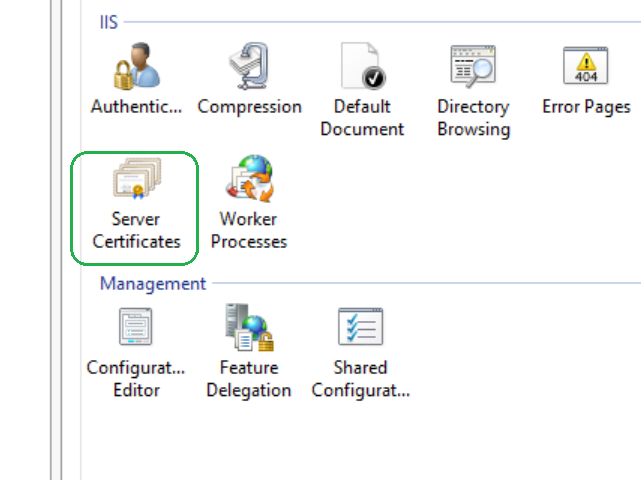
- Log into your Remote Desktop Server and open IIS.msc
- Expand your Site and open ‘Server Certificates’
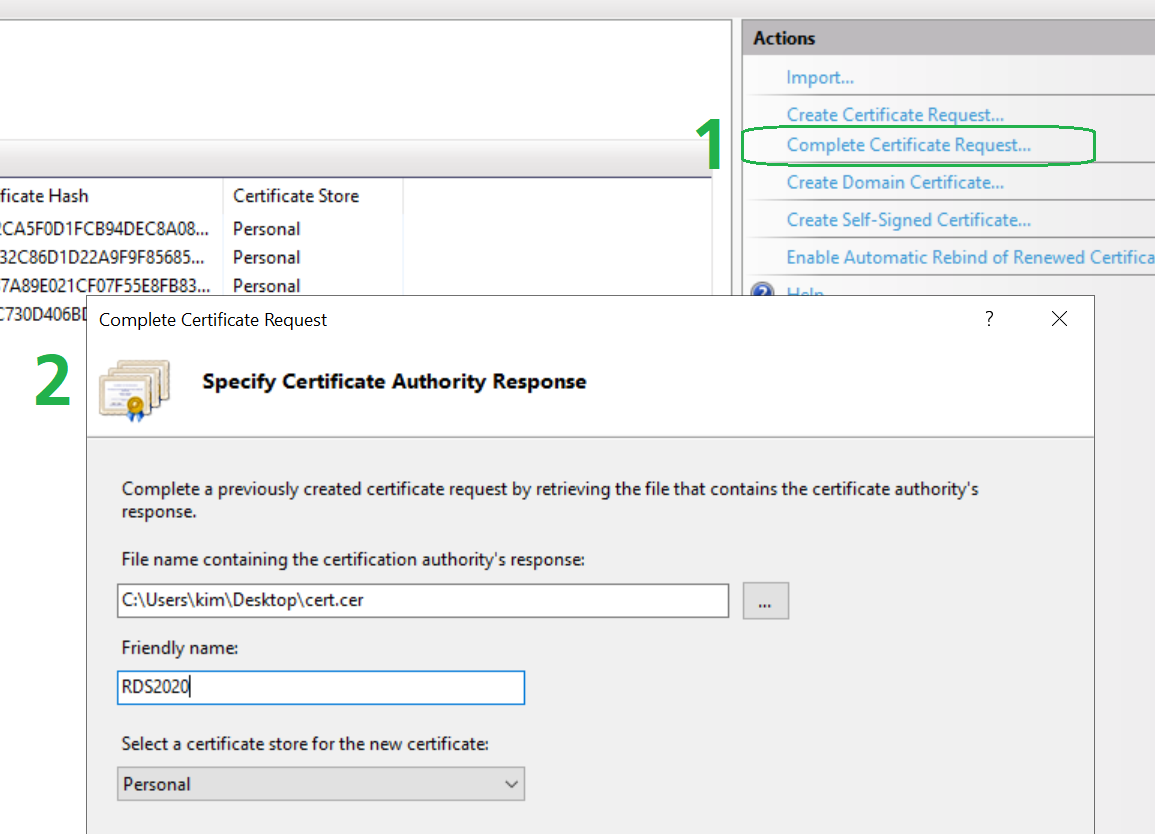
- On the Action pane click ‘Complete Certificate Request’, then fill-out the details as required.
- Friendly Name = A meaningful name to identify the Certificate
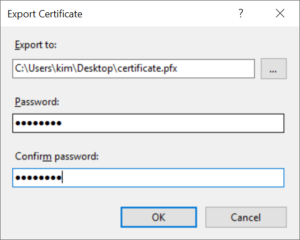
- Right-click the newly added Certificate and choose Export
- Complete the details, ensure to save as *.PFX
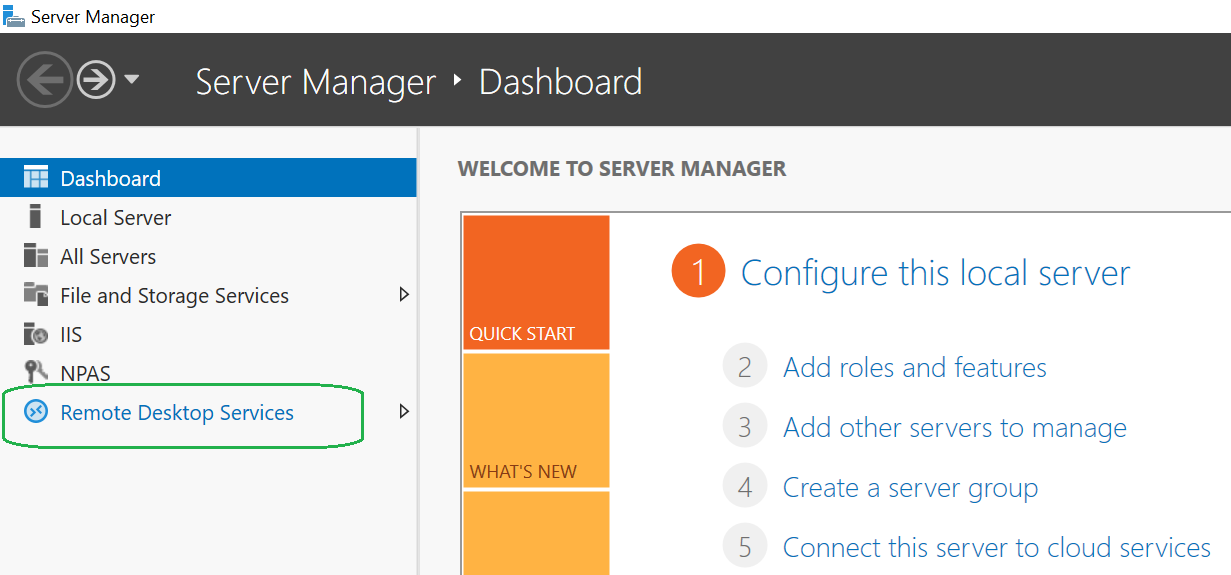
- Open Server Manager and go to Remote Desktop Services
- Under Deployment Overview, click Tasks > Edit Deployment
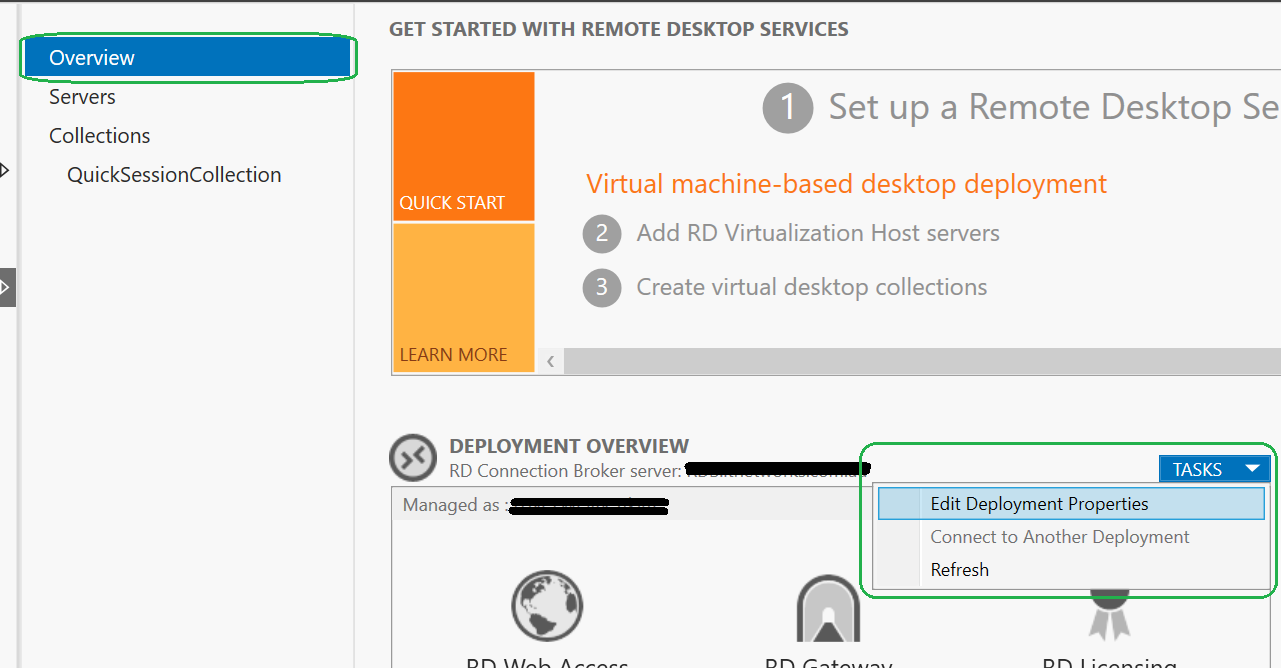
- Click on Certificates then highlight the first Role Service > Select Existing Certificate
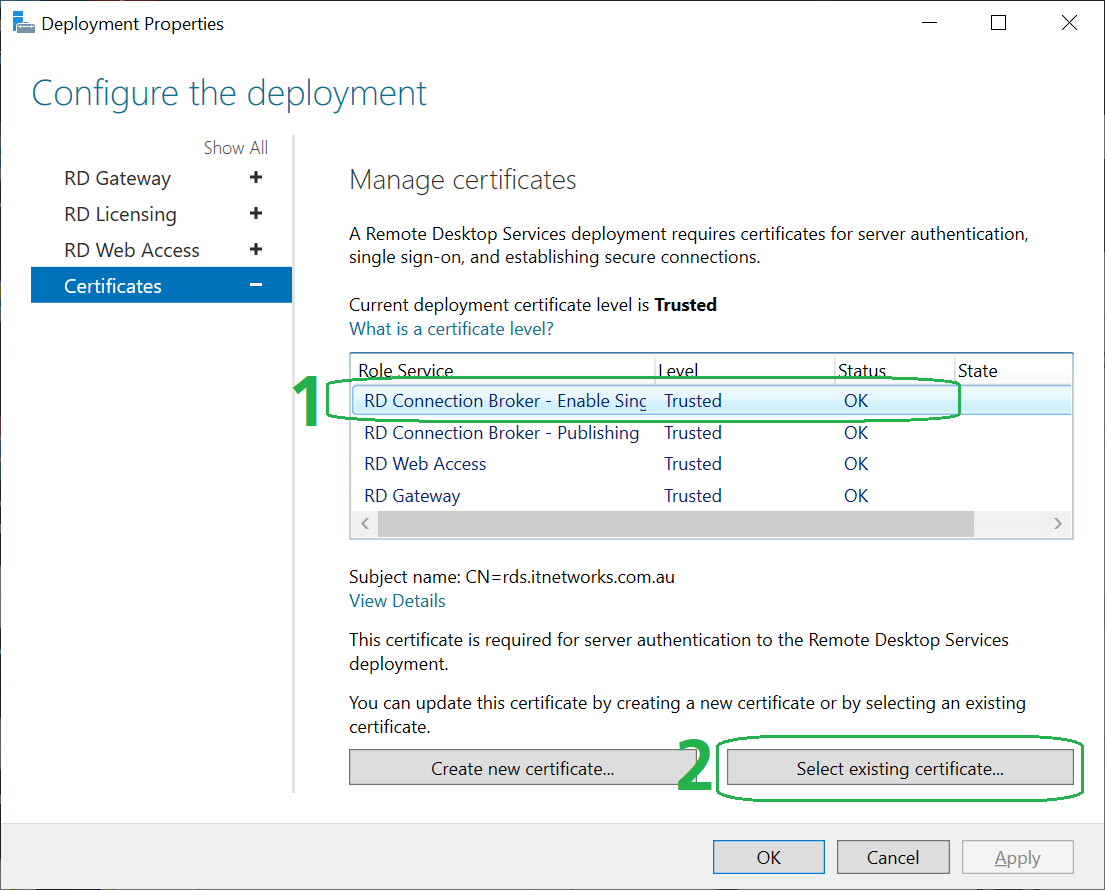
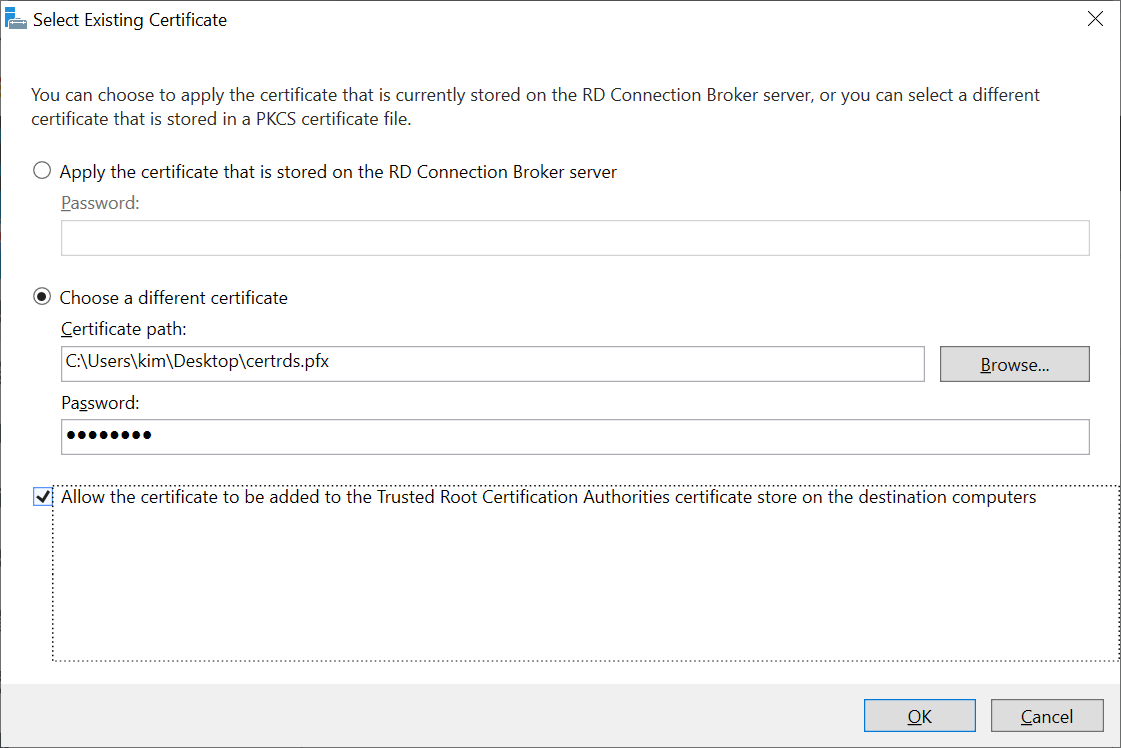
- Choose A Different Certificate, locate the *.PFX file you exported earlier and password you typed during export
- Repeat step 14 for each additional Role Service that requires the new SSL Certificate
- Click OK when done
- Reboot your Server
- For a security sanity check head over to https://www.ssllabs.com/ssltest and test your new SSL Certificate!
I hope this was of some use, as with all our articles, please feel free to reach out if you need assistance.