Stop the Spear Phishing: Stopping other people from using your domain name!

LinkedIn
Twitter
Facebook

Spear Phishing

One of the methods used by scammers is to impersonate someone from your own domain name. E.g. you get an email from accounts@yourdomain.com.au asking you to open email attachments or click links.

To combat this is easy, stop allowing them from using your domain name in the first place!

Stop the Spear Phishing 

Simply enable DKIM, DMARC and SPF. That’s a lot of acronyms you say? Don’t worry this article will tell you how to do it.

For the technically minded, DKIM is simply a process of locks and keys. When you send an email to someone, the email header is encrypted with your private key. The receiving email server then decrypts the header using your DKIM public key. If decryption is possible, then the server knows that the email is genuine and 100% from yourdomain.com.au

Prerequisites:

  • An active Microsoft 365 subscription with Custom email domain already configured
  • Access to your DNS hosting provider
  1. First log into your Office365 workload in Powershell as Administratoropen powershell session
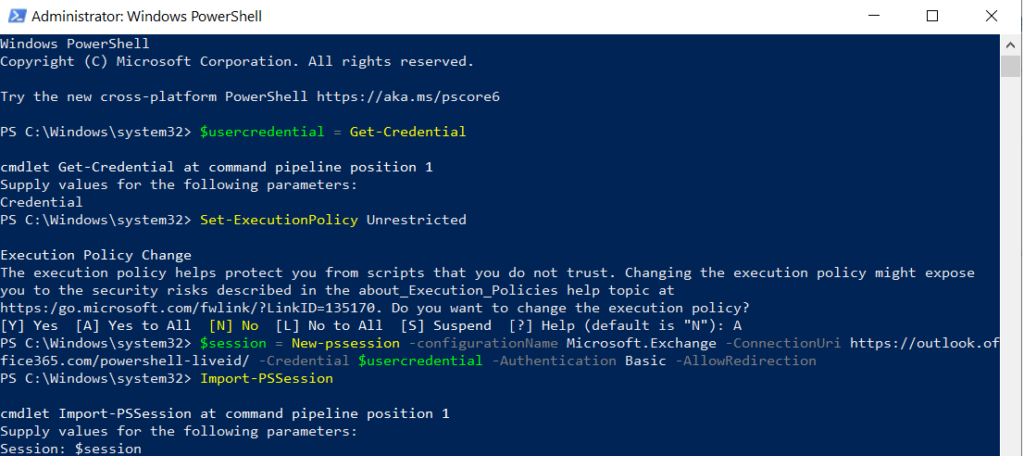
  2. Determine your DKIM session keys:
    Get-DkimSigningConfig -Identity | Format-List Selector1CNAME, Selector2CNAME

    powershell DKIM session keys

  3. Log into your DNS hosting provider
  4. In this example we are using Synergy Wholesale  in Australia, edit your domain
  5. Create 2 new CNAME records
    selector1_domainkey.    IN    selector1-yourdomain-com-au._domainkey.[tennantaccount].onmicrosoft.com    TTL 3600

    selector2_domainkey.    IN    selector2-yourdomain-com-au._domainkey.[tennantaccount].onmicrosoft.com   TTL 3600

    E.g. selector1-itnetworks-com-au._domainkey.itnetworks.onmicrosoft.com

  6. Create a TXT Record
    _dmarc.    IN v=DMARC1; p=reject   TTL 3600
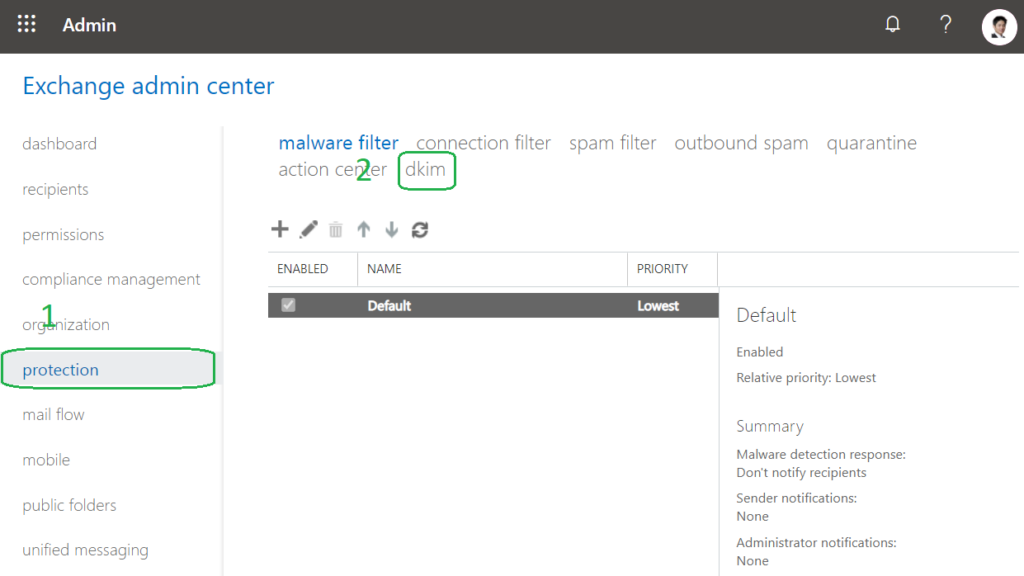
  7. Now head over to your Office365 Exchange Admin > Protection > DKIMexchange admin centre dkim
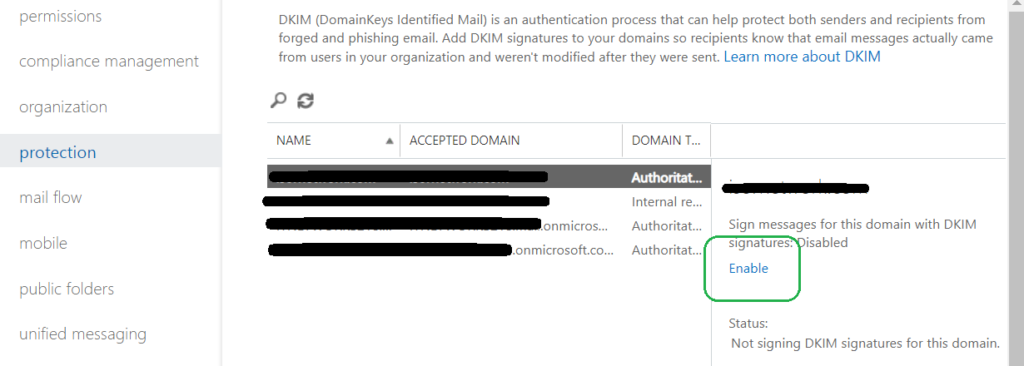
  8. Select your domain from the list then click “Enable”Stop the Spear Phishing with Exchange Online Admin Centre
  9. Wait for your DNS changes to take affect.
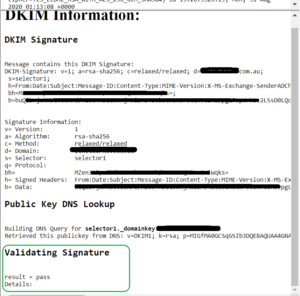
  10. Head over to https://dkimvalidator.com
  11. The website will provide a random email address to send an email to. Send a test email to that address.dkim validator email check
  12. Wait a few minutes for the address to transmit, then click “View Results”
  13. What you are looking for is a DKIM result of PASS.dkim result of email check

If you have followed this far then your email domain is now protected from being ‘used’ by others. As with all our guides, please feel free to reach out if you need help with any of this.

Want to stay up to date with useful tech-tips?  

Follow us on LinkedIn, Facebook or Twitter to be notified when we post new content. Or, even better, scroll down to the very bottom of this page to sign up for our Newsletter. We only send them once a month and you can always unsubscribe.