



Configuring the Cisco Router
Here is how you can configure your Cisco ISR router to use real SSL certificates instead of self-signed.
- Define an RSA key of 2048bit length
crypto key generate rsa label Synergy.Key modulus 2048

- Create a trustpoint
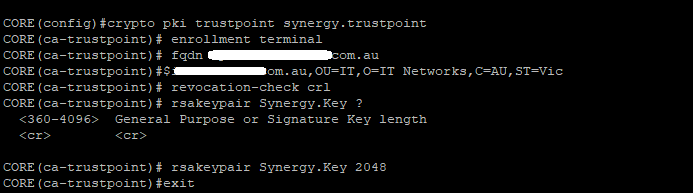
crypto pki trustpoint synergy.trustpointenrollment terminal
fqdn xxx.yourdomain.com.au
subject-name CN=xxx.yourdomain.com.au,OU=IT,O=IT Networks,C=AU,ST=Vic
revocation-check crl
rsakeypair Synergy.Key 2048
- Generate the Certificate Signing Request (CSR)
crypto ca enroll synergy.trustpoint
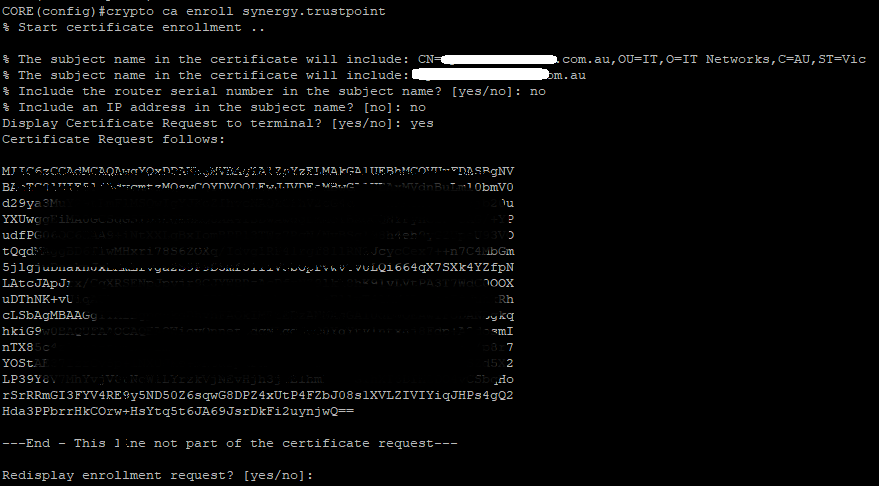
- Go and purchase an SSL Certificate, provide the CSR from above.
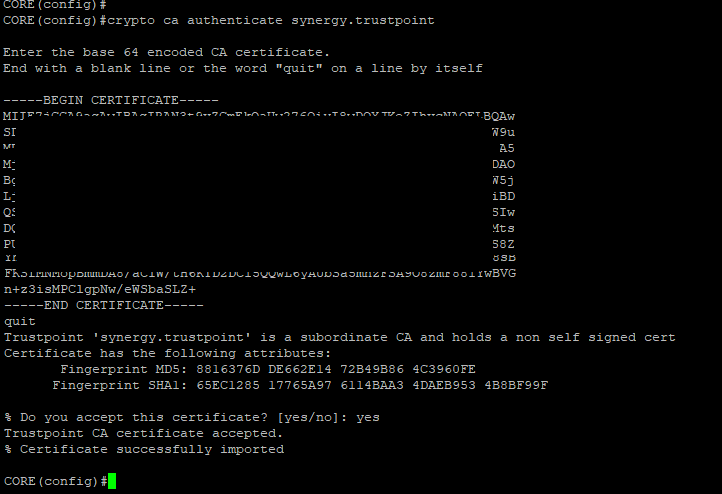
- Once the Certificate has been approved, we need to import the ‘Intermediate’ first.
crypto ca authenticate synergy.trustpoint
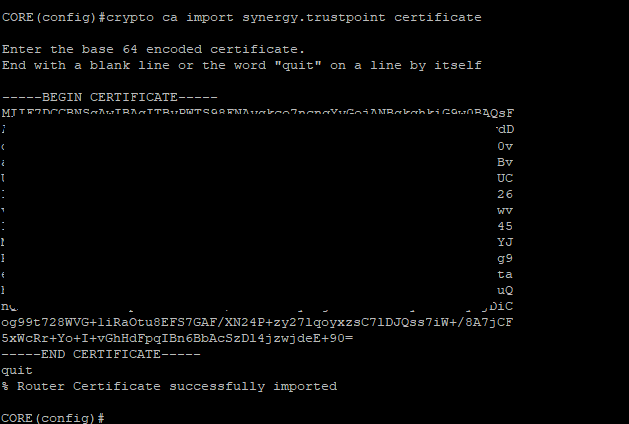
- Now import the actual SSL Certificate
crypto ca import synergy.trustpoint certificate
- Configure Authentication Authorisation and Accounting (AAA)
aaa new-model
aaa authentication login a-eap-authen-local local
aaa authorization network a-eap-author-grp local
- Create an IP Pool for VPN users
ip local pool ACPOOL 192.168.10.5 192.168.10.10
Note: Use an uncommon IP block
crypto ikev2 authorization policy ikev2-auth-policy
pool ACPOOL
dns 10.0.1.1
Note: Your Internal DNS Server
- Configure the IKEv2 Proposal & Policy
!
crypto ikev2 proposal Anyconnect-proposal
encryption aes-cbc-256
integrity sha256
group 14
!
crypto ikev2 policy Anyconnect-policy
proposal Anyconnect-proposal
!
crypto ikev2 profile AnyConnect-EAP
match identity remote key-id *$AnyConnectClient$*
authentication local rsa-sig
authentication remote anyconnect-eap aggregate
pki trustpoint synergy.trustpoint   << The trustpoint from earlier
aaa authentication anyconnect-eap a-eap-authen-local
aaa authorization group anyconnect-eap list a-eap-author-grp ikev2-auth-policy
aaa authorization user anyconnect-eap cached
virtual-template 100
anyconnect profile acvpn
! - Configure encryption
!
crypto ipsec transform-set TS esp-aes 256 esp-sha256-hmac
mode tunnel
!
crypto ipsec profile AnyConnect-EAP
set transform-set TS
set ikev2-profile AnyConnect-EAP
! - Configure your interfaces
!
interface loopback100
ip address 10.0.0.1 255.255.255.255
!
interface Virtual-Template100 type tunnel
ip unnumbered Loopback100
ip mtu 1400
tunnel mode ipsec ipv4
tunnel protection ipsec profile AnyConnect-EAP
! - Create an AnyConnect XML profile as per the image settings below:
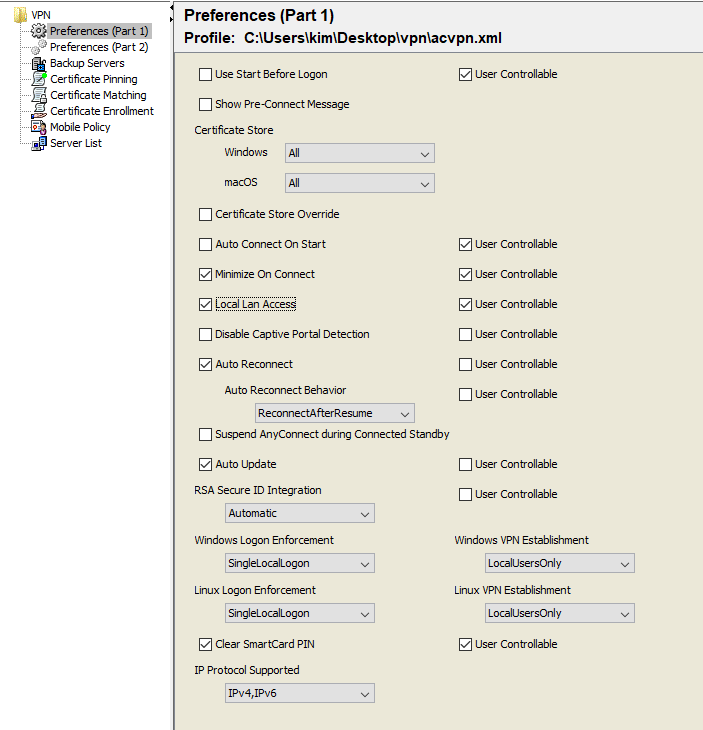
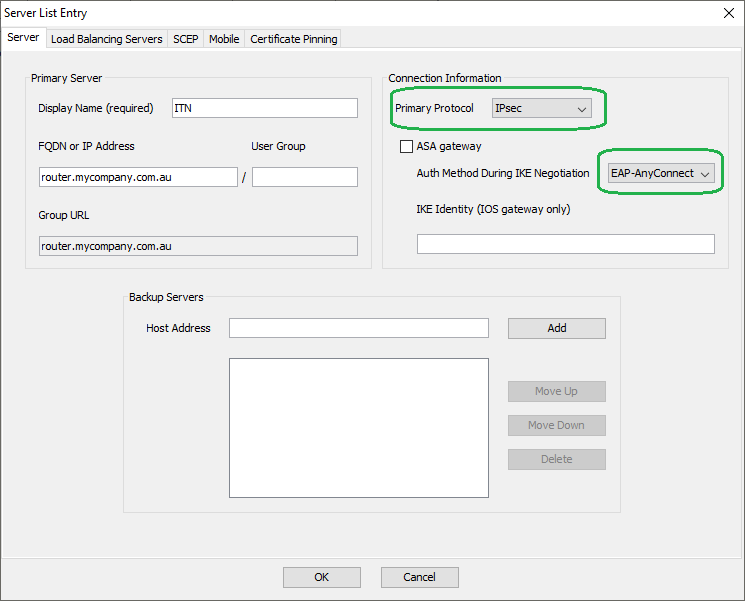
- Save the XML file as acvpn.xml and upload this to the router’s bootflash
- Define the VPN profile
crypto vpn anyconnect profile acvpn bootflash:/acvpn.xml
- Open up Cisco AnyConnect on your test computer, and connect to the VPN service.
Please note this configuration will route all traffic via the VPN. If you want to specify traffic you will need to create a split tunnel config such as:ip access-list standard split_tunnel permit 10.0.0.0 0.255.255.255 ! crypto ikev2 authorization policy ikev2-auth-policy route set access-list split_tunnel
As always please feel free to reach out if you need assistance with this.