
Azure Active Directory
Syncing Active Directory to Microsoft 365 Azure Active Directory is easy. Simply run the AD Connect on your Domain Controller and all will sync as expected. What happens if you have a situation where you’re deploying a new server and have a empty Active Directory, or when Microsoft 365’s Azure Active Directory has all the users but your local Active Directory is different (completely different). We’ll show you how you can use Azure AD Connect in ‘reverse’ situation.
- Log into the Microsoft 365 Admin Center https://login.microsoftonline.com
- Go to Settings > Domains
Make a note of all the domains that are NOT present on your local Domain Controller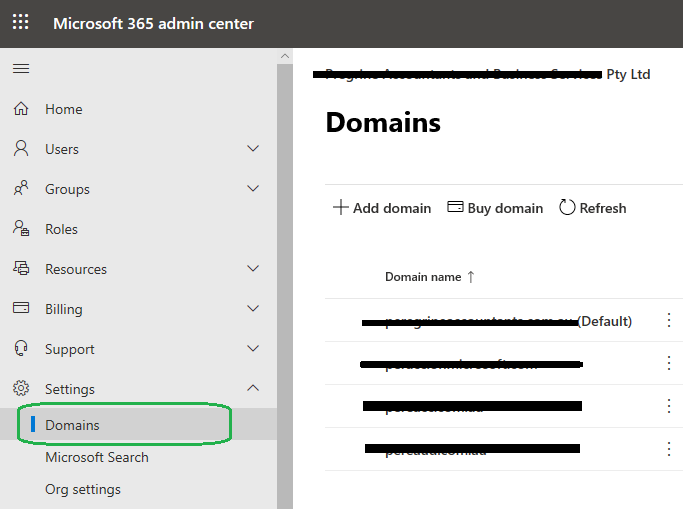
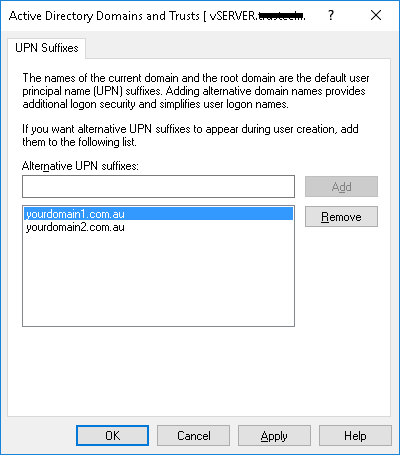
- Open Active Directory Domain and Trusts
- Right-click the top of the tree and go into properties
- Enter in all the domains that are present in Azure Active Directory that you noted in step 2. but not present locally
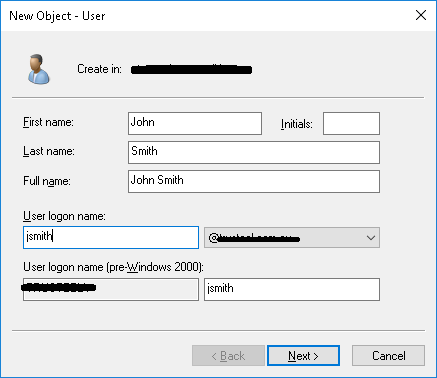
- Start creating the users in Active Directory. Ensure that the Primary email address in Azure Active Directory is also the chosen @domain when creating the account.
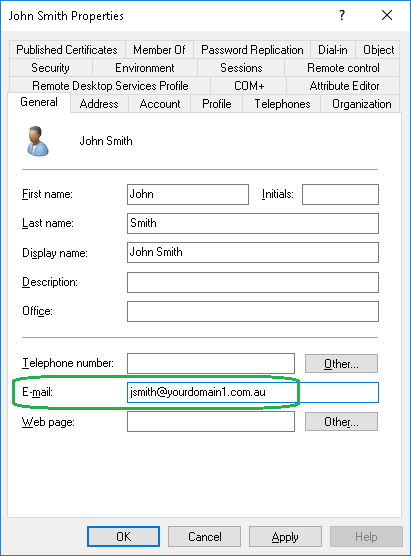
- Edit the account after it is created, in the E-mail field enter the users Primary email address as it appears in Azure Active Directory.
- Click on the Attribute Editor tab, then find Proxy Addresses
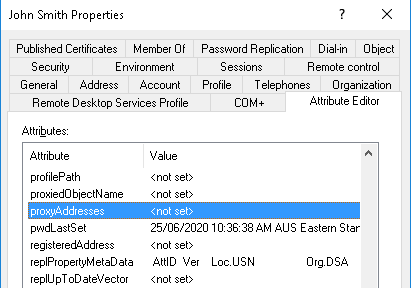
- Add all email addresses that the user has. Case Sensitive!
SMTP: This designates the primary email address
smtp: This designates an alias email address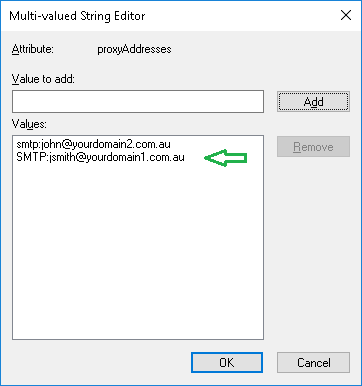
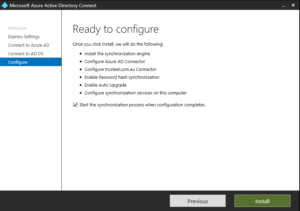
- Download & Run Azure AD Connect
https://www.microsoft.com/en-us/download/details.aspx?id=47594 - Use Express settings.
- Enter in your Tennant Account details when prompted.
- Enter in your local Administrator account when prompted.
- Hit Install, and your job is done!
As always if you need assistance with this, please feel free to reach out.


