
There are many articles online on how to renewal a SSL certificate, however they are generic and not focused on Remote Desktop Servers. Below is a quick and easy way to renew your SSL Certificate on your RDS or Terminal Server.
As we are Aussie based, this guide uses Synergy Wholesale as the reseller of SSL Certificates.
Okay lets go:
Renew Your SSL Certificate
- Head over to your certificate provider, in our case Synergy Wholesale, and go to the expiring SSL Certificate and click Renew

- An email for domain validation will now be sent to the following email addresses:
- administrator@domain.com.au
- webmaster@domain.com.au
- hostmaster@domain.com.au
- Once the email is received at the above addresses, obviously accept the domain validation
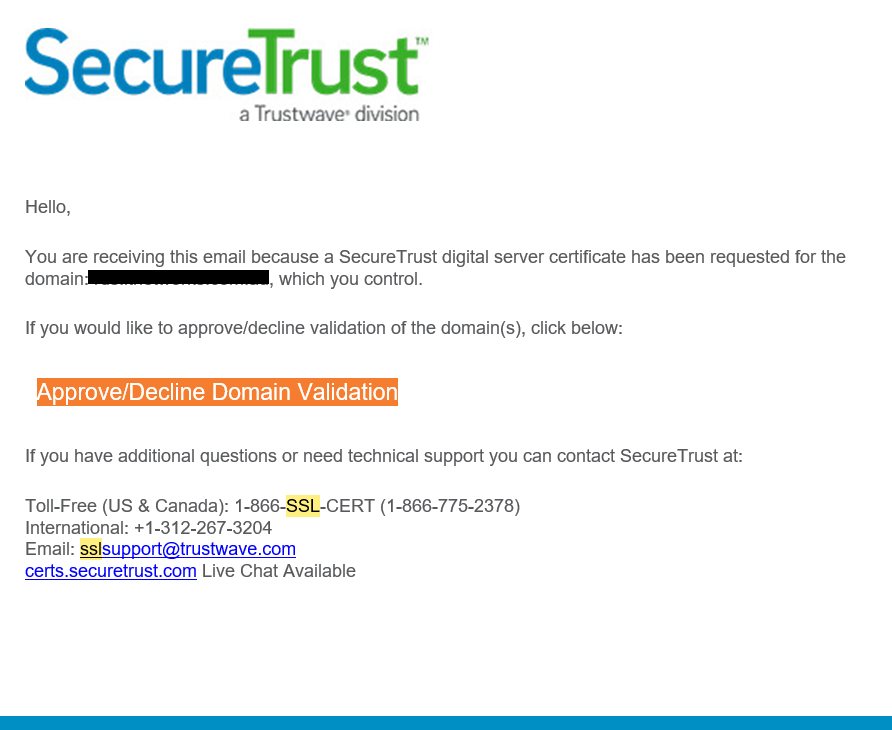
- Approval will take a few hours and sometimes days! Please wait for the approval with the attached new Certificate.
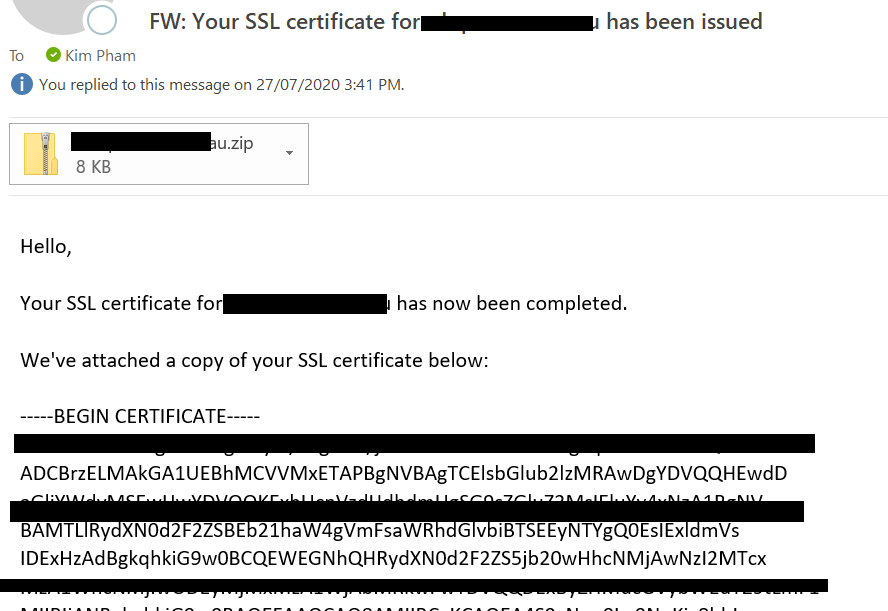
- In the email, highlight and copy the certificate text, including the ‘Begin Certificate’ & ‘End Certificate’ in to a new Notepad file
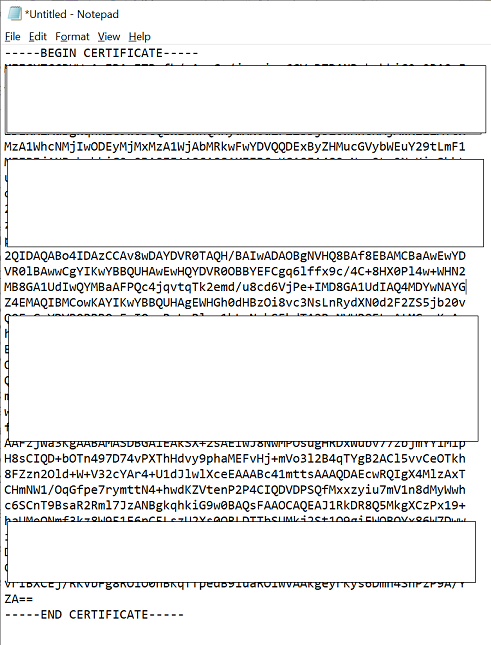
- Save the File as certificate.cer
- Log into your Remote Desktop Server and open IIS.msc
- Expand your Site and open ‘Server Certificates’
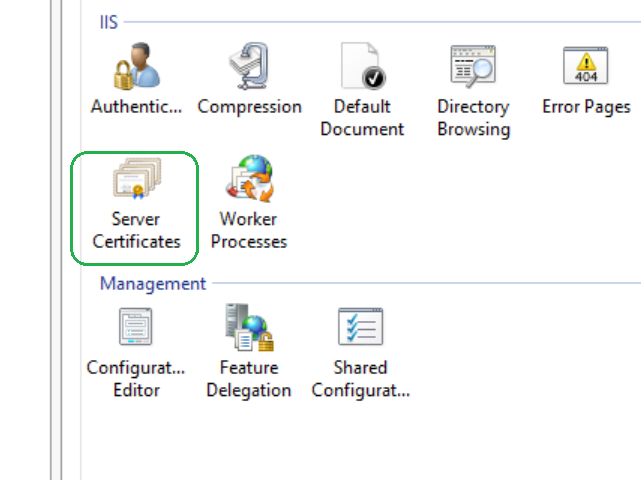
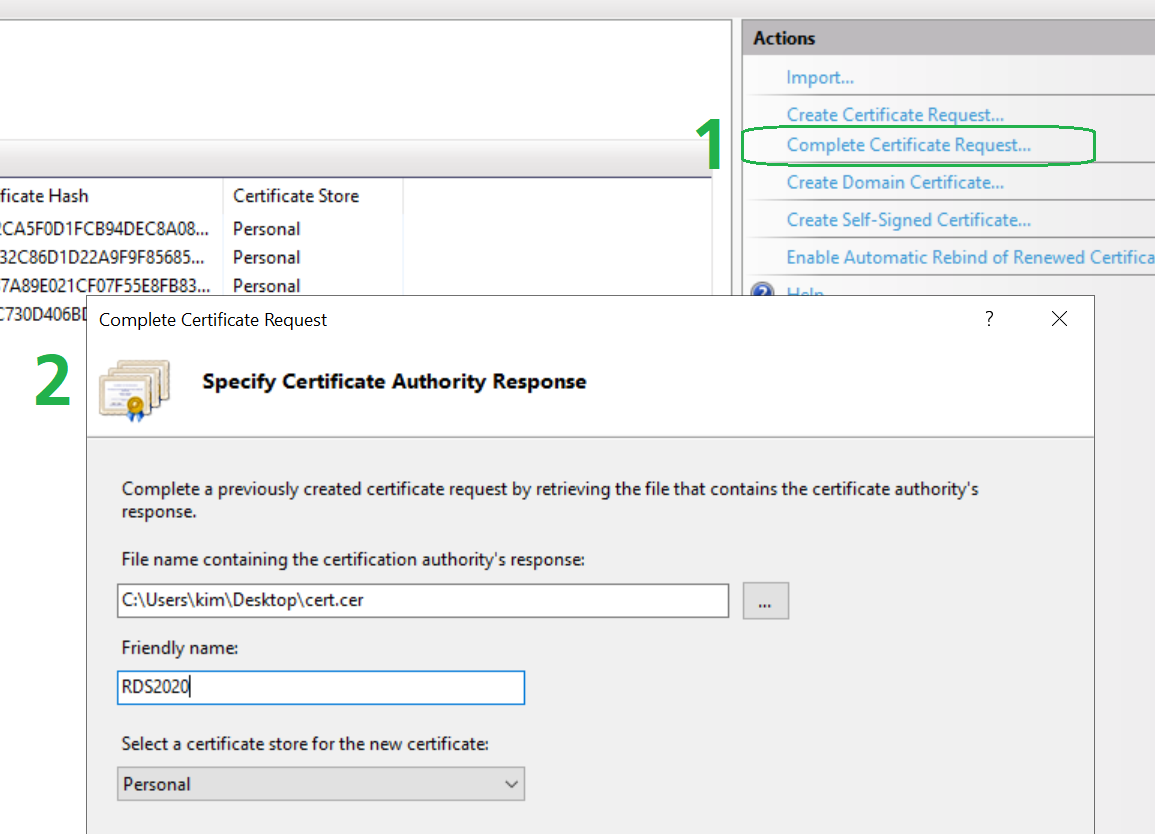
- On the Action pane click ‘Complete Certificate Request’, then fill-out the details as required.
- Friendly Name = A meaningful name to identify the Certificate
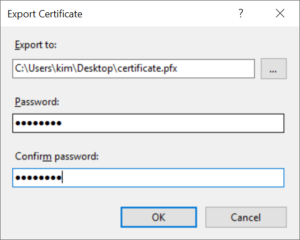
- Right-click the newly added Certificate and choose Export
- Complete the details, ensure to save as *.PFX
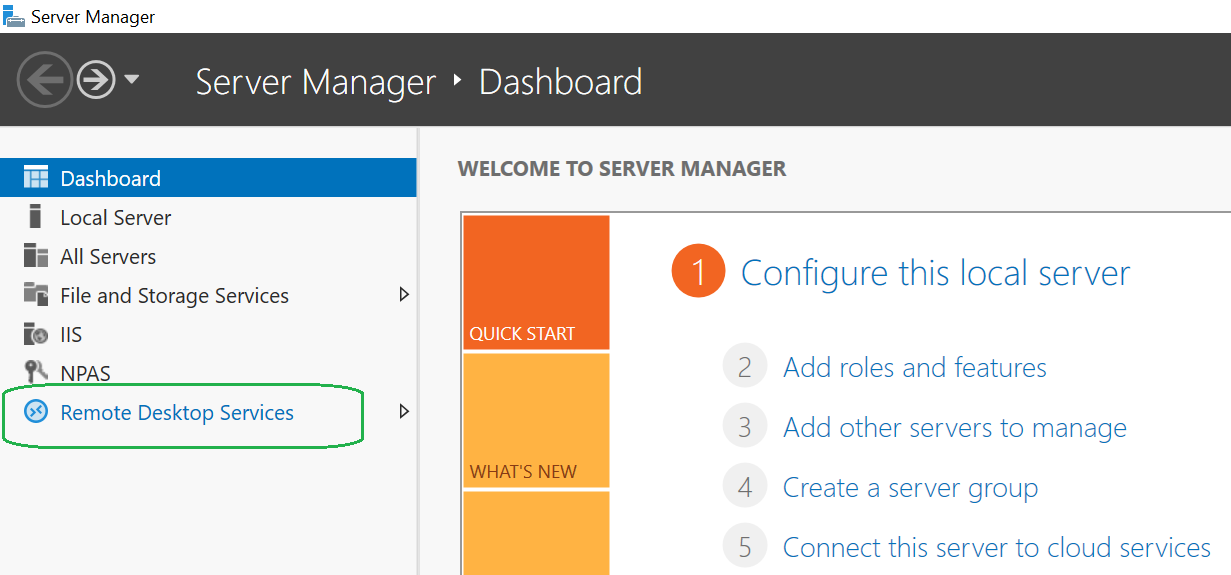
- Open Server Manager and go to Remote Desktop Services
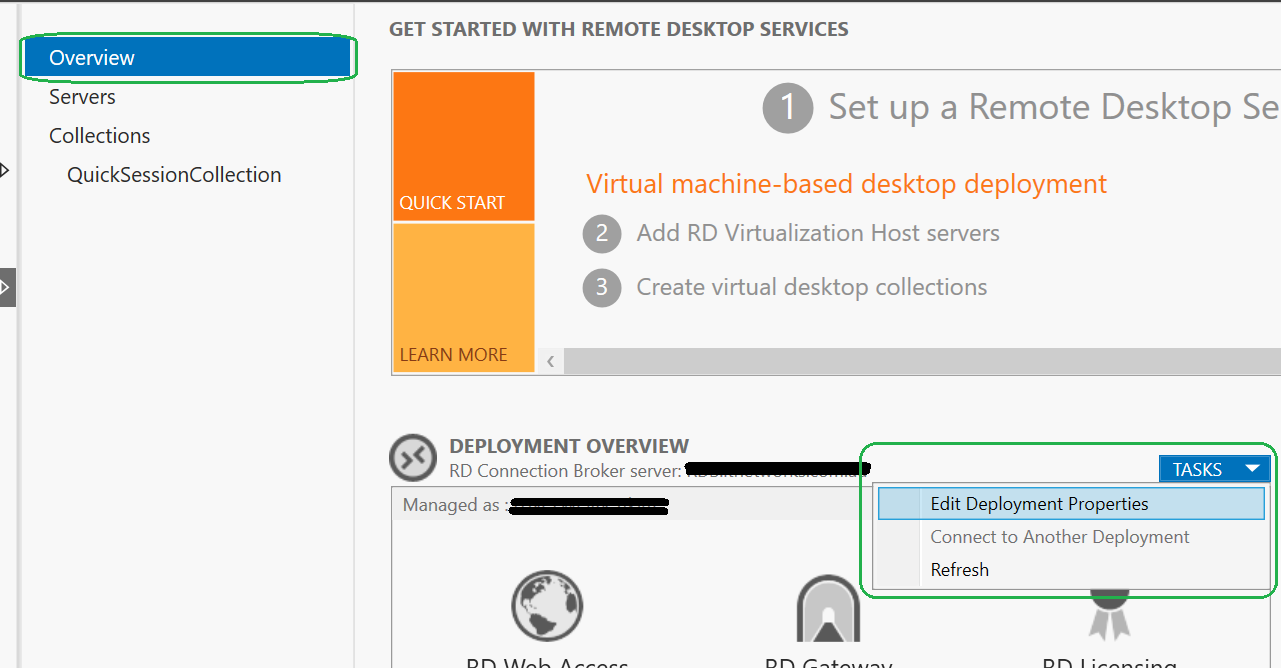
- Under Deployment Overview, click Tasks > Edit Deployment
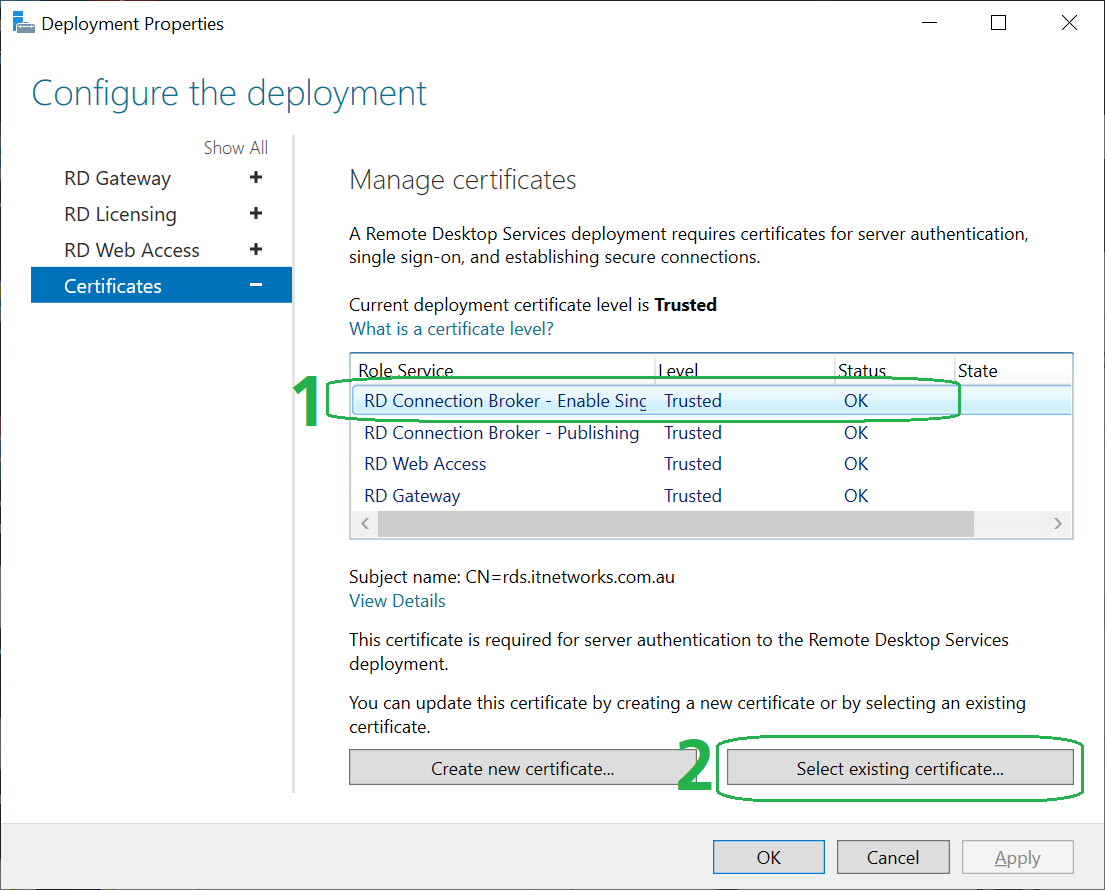
- Click on Certificates then highlight the first Role Service > Select Existing Certificate
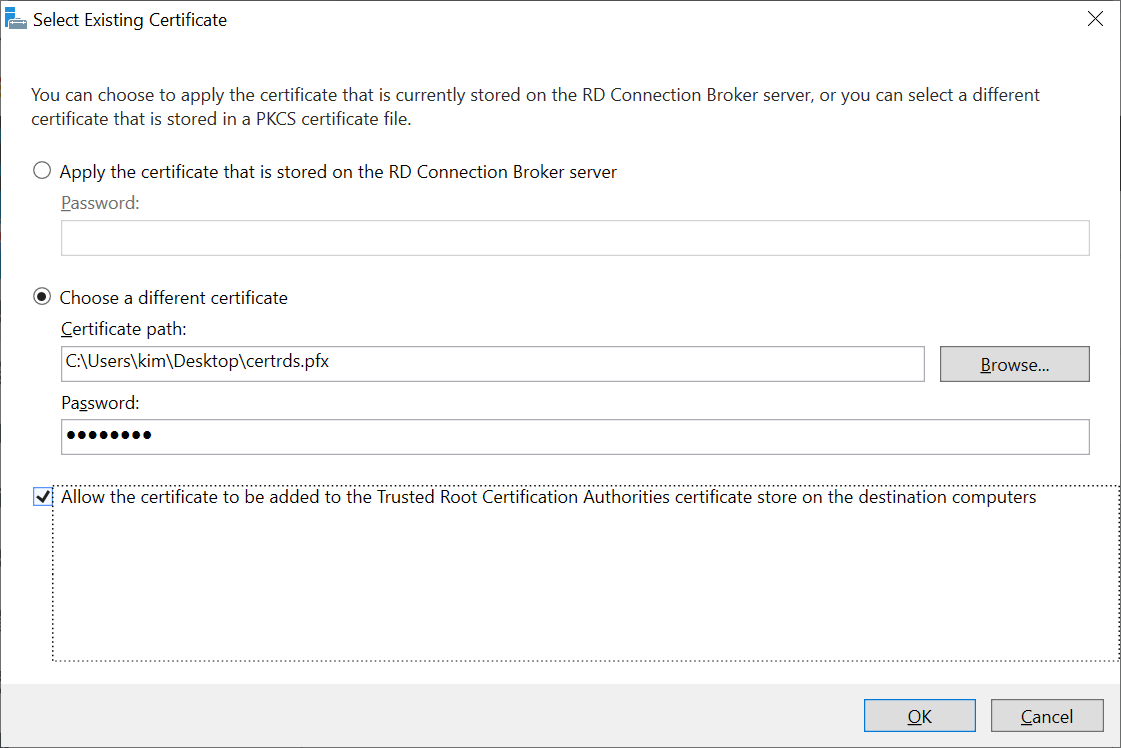
- Choose A Different Certificate, locate the *.PFX file you exported earlier and password you typed during export
- Repeat step 14 for each additional Role Service that requires the new SSL Certificate
- Click OK when done
- Reboot your Server
- For a security sanity check head over to https://www.ssllabs.com/ssltest and test your new SSL Certificate!
I hope this was of some use, as with all our articles, please feel free to reach out if you need assistance.


