


Are you stuck working from home and need to configure Azure P2S VPN to gain access to the infrastructure hosted in your business cloud? The good news is that you absolutely can do this, using Azure’s P2S VPN service. This post will take your through 25 comprehensive and easy steps that will help you set it up and enjoy getting work done a lot easier.
The current pandemic has forced many businesses to turn their workforce into virtual workforce overnight. Collectively, we have taken a lot of things for granted, including technology driven workplace and what now looks like light-weight workforce mobility.
Subsequently, not everybody is as prepared in terms of IT support as we should be. Almost like pioneers, we are learning to do things differently, doing things we have never had to do by ourselves. We all need to stretch our capabilities.
But sometimes we just need a little help. So, here it is.
What you need to get started with Azure at home
Azure P2S (Point-to-Site) uses SSL based digital certificates (Port 443) so it should work well in situations where remote workers are connecting from restrictive networks.
There are some pre-requisites to use Azure when working from home. You will need:
- Azure Virtual Network
- Network Subnet
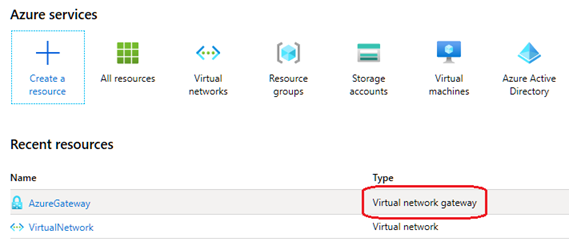
- Virtual network gateway already setup
If you meet those pre-requisites, you can follow these 25 sure-fire steps to configure Azure’s P2S VPN on your home system.
Here are 25 Steps to Configure Azure’s P2S VPN at Home
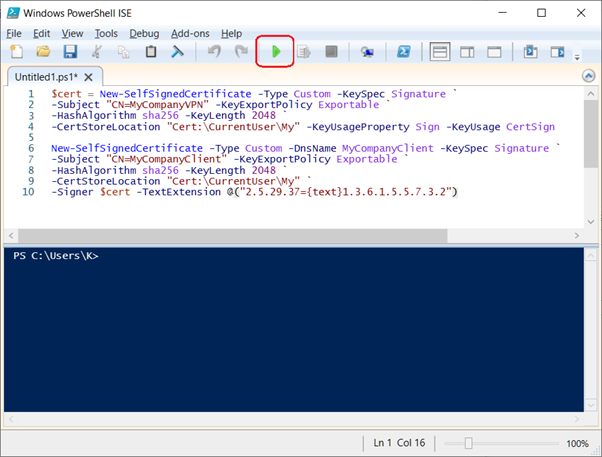
- Open Powershell ISE to create the root and client certificates
- Paste in the following into Untitled1.ps1
$cert = New-SelfSignedCertificate -Type Custom -KeySpec Signature `
-Subject "CN=MyCompanyVPN" -KeyExportPolicy Exportable `
-HashAlgorithm sha256 -KeyLength 2048 `
-CertStoreLocation "Cert:\CurrentUser\My" -KeyUsageProperty Sign -KeyUsage CertSign
New-SelfSignedCertificate -Type Custom -DnsName MyCompanyClient -KeySpec Signature `
-Subject "CN=MyCompanyClient" -KeyExportPolicy Exportable `
-HashAlgorithm sha256 -KeyLength 2048 `
-CertStoreLocation "Cert:\CurrentUser\My" `
-Signer $cert -TextExtension @("2.5.29.37={text}1.3.6.1.5.5.7.3.2")- Execute the script but clicking Run Script
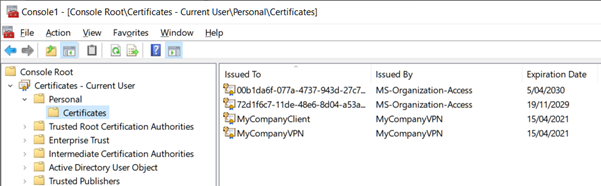
- Open Windows mmc.exe
- Add Snap-in > Certificates > My user account
- Expand Certificates > Personal > Certificates
- Export the Root certificate, choose to not export the private key
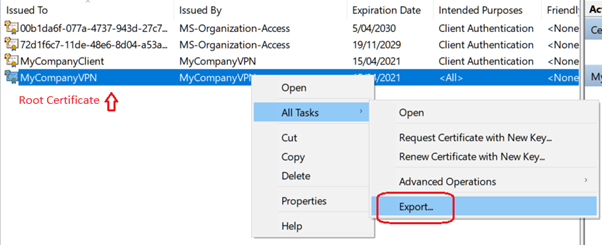
- Choose Base-64 encoded, continue to finish the export
- Export the Client certificate, choose to export the private key
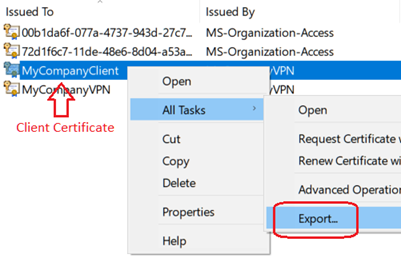
- Accept all defaults for .PFX
- Assign a password to the certificate, continue to finish the export.
- Log into the Azure Portal
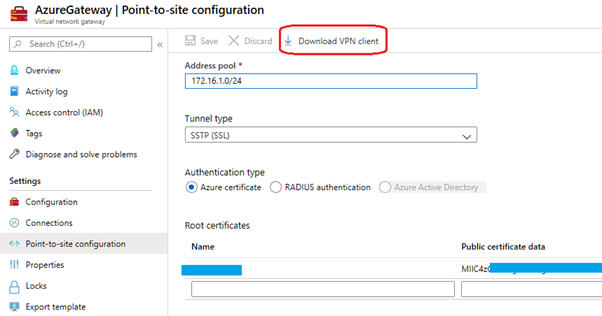
- Open the Virtual Network Gateway blade, choose Point-to-site configuration
- Create the configuration as follows
- Address pool, type in a network that will be assigned to VPN users
- Choose Authentication type as Azure certificate
- The Name will be the same name provided during certificate creation in Powershell ISE
- Open the Root certificate exported earlier (*.cer) with notepad
- Highlight and Copy the data between the BEGIN and END, do not copy the BEGIN header and END footer
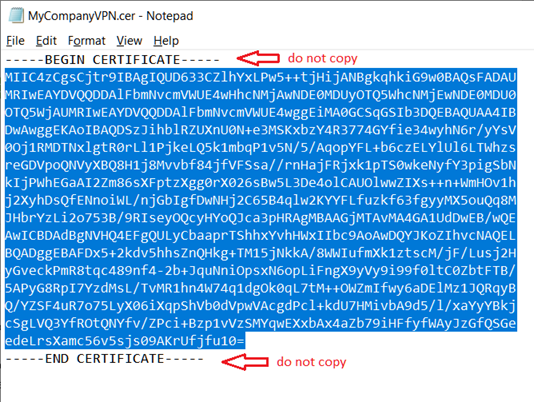
- Paste in the data into the Public certificate data, then Click Save
- Allow Azure to process the changes, this will take about 5 minutes then Click Download VPN Client
- On your client PC, install the *.PFX certificate.
- Run the VPN Client setup file.
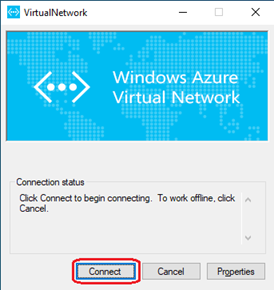
- Click Connect
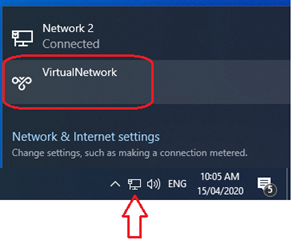
- All done
If you get stuck, call out to your IT support. Or, you can contact IT Networks.